
Buying & Setting Up Phone Numbers 📞 💬
In this video, I walk you through the process of setting up, adding, and removing phone numbers within our system, especially in relation to the A2P10DLC application. I explain how to search for specific area codes, verify new numbers, and configure call settings, including call recording and timeout options. It's crucial to inform us whenever you want to add new numbers so we can properly reconnect them to the relevant users. Additionally, I touch on compliance measures and messaging limits to ensure we stay within regulatory guidelines. Please make sure to follow the steps outlined and reach out if you have any questions or need assistance.
Phone Number Setup and Management SOP
Objective
This SOP outlines the steps to set up, add, and manage phone numbers within the system, ensuring compliance and proper configuration for effective communication.
Key Steps
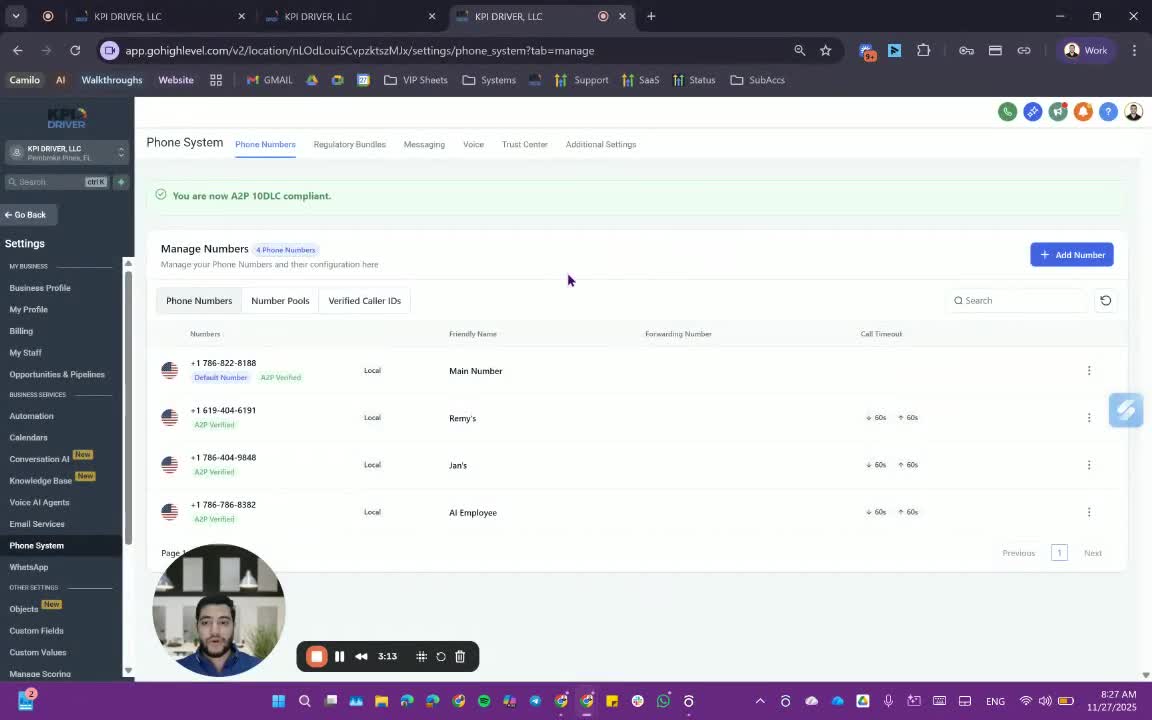
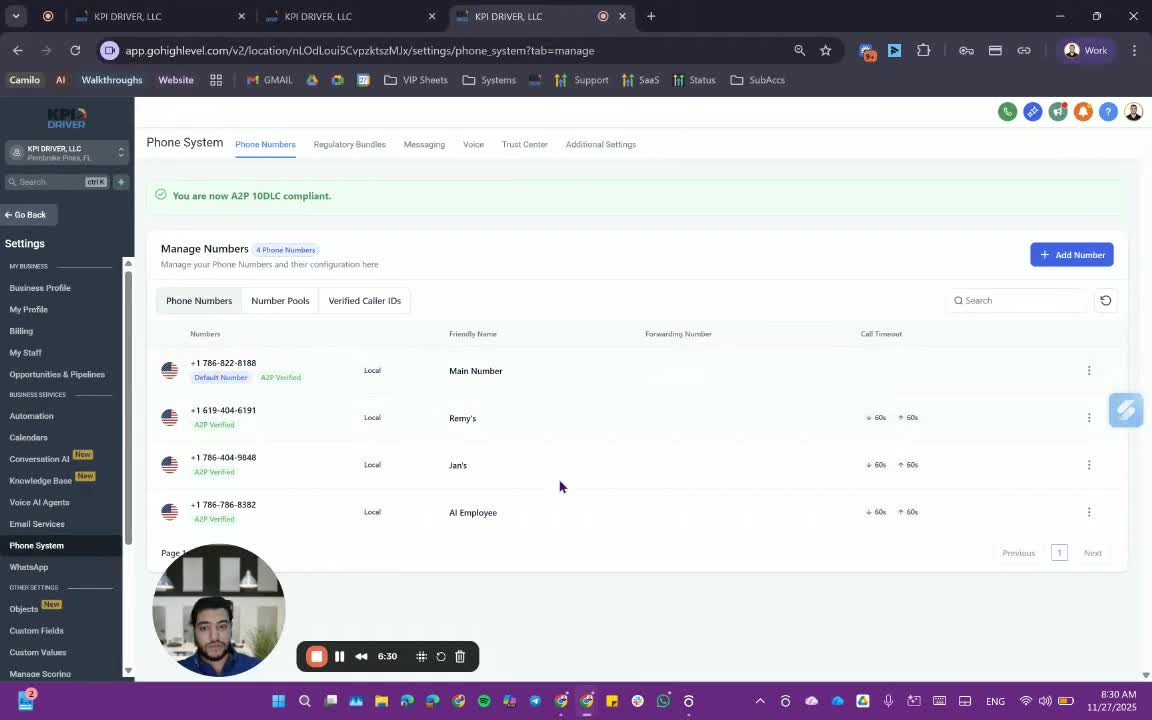
1. Access Phone System Settings 0:58

- Navigate to Settings.
- Click on Phone Systems to view the phone numbers.
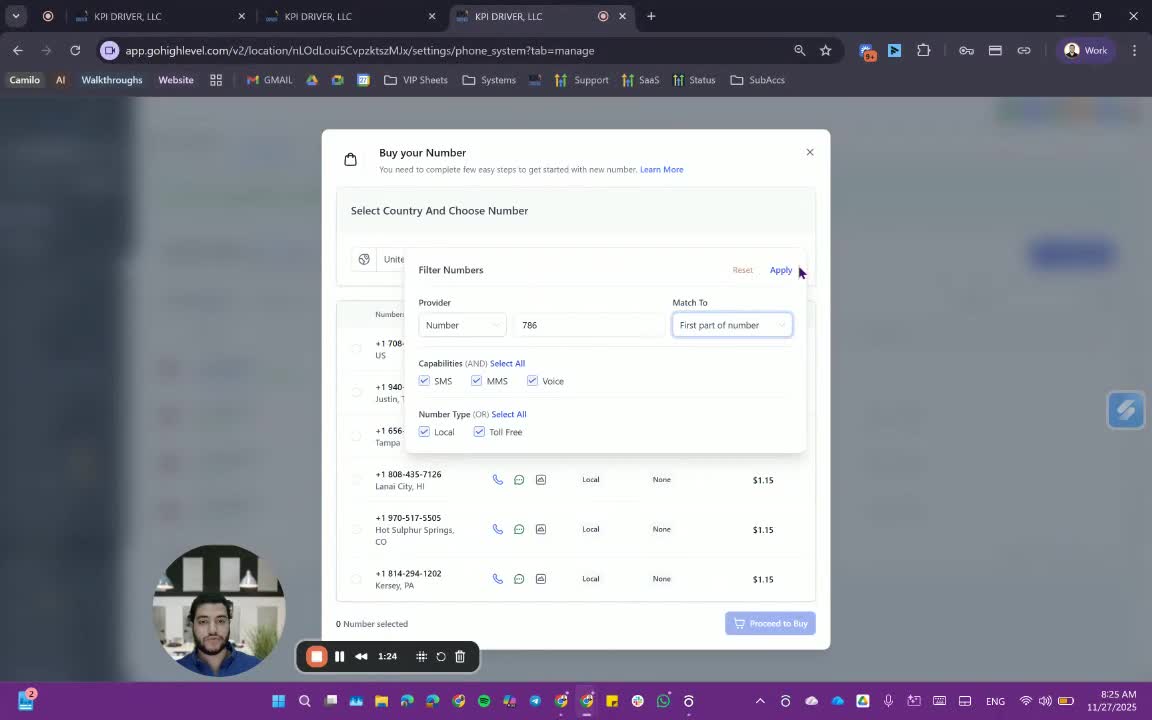
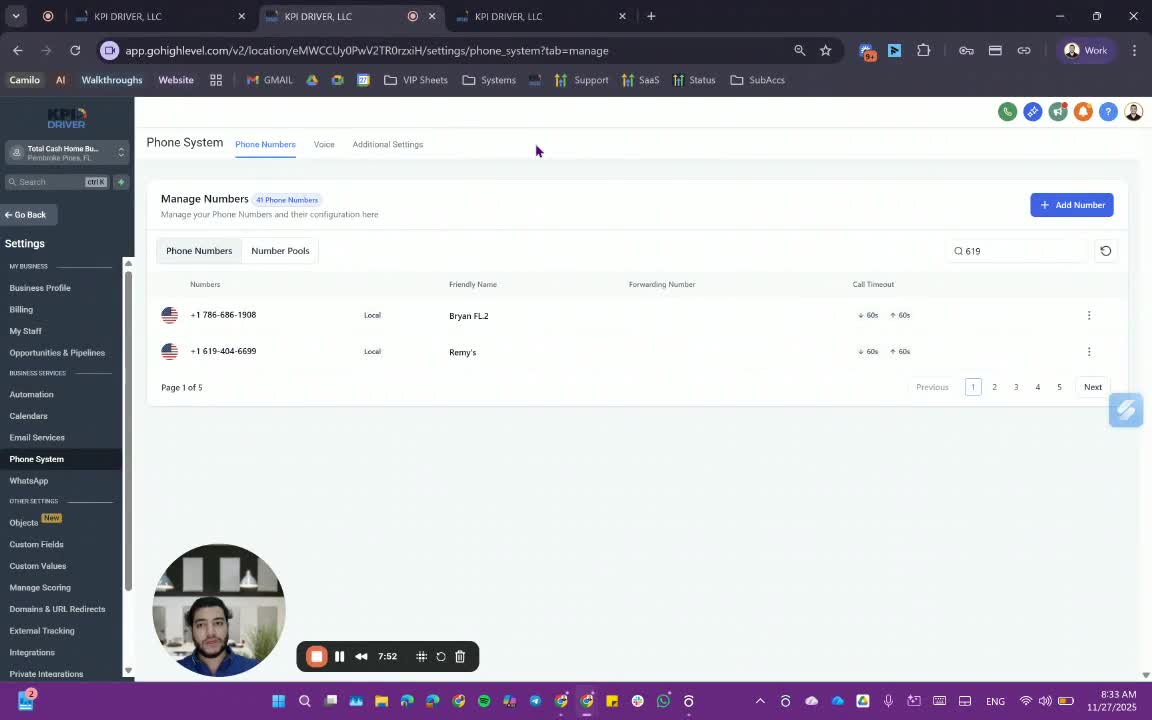
2. Add a New Phone Number 1:06

- Click on Add Phone Number.
- Search for a specific area code (e.g., 786).
- Select the desired number from the available options and proceed to purchase.
3. Verify A2P Status 1:40
- Refresh the page to see the A2P verified status for the newly added number.
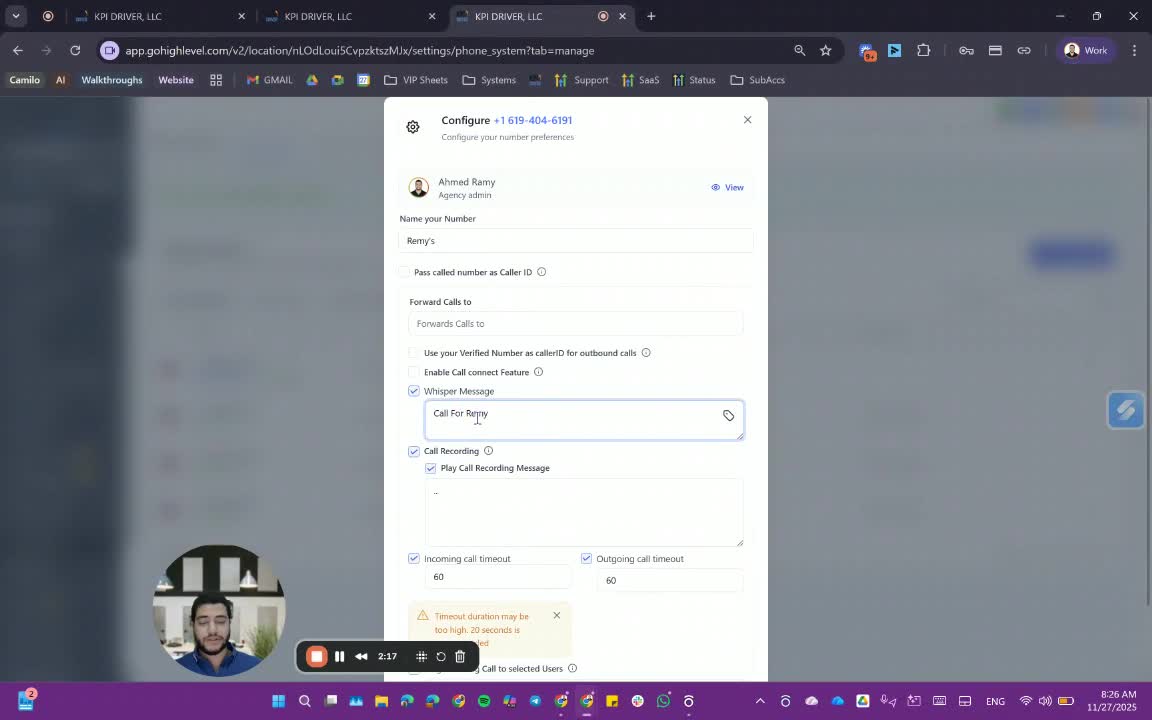
4. Configure Phone Number Settings 2:00

- Click on Edit next to the phone number.
- Name the number and enable features such as Call to Connect and Call Recording.
- Set the Outgoing Call Timeout to 60 seconds.
5. Assign Users to Phone Numbers 2:33
- Ensure the number is assigned to a user in their profile to see it in the settings.
- If not assigned, the number will not appear for selection.
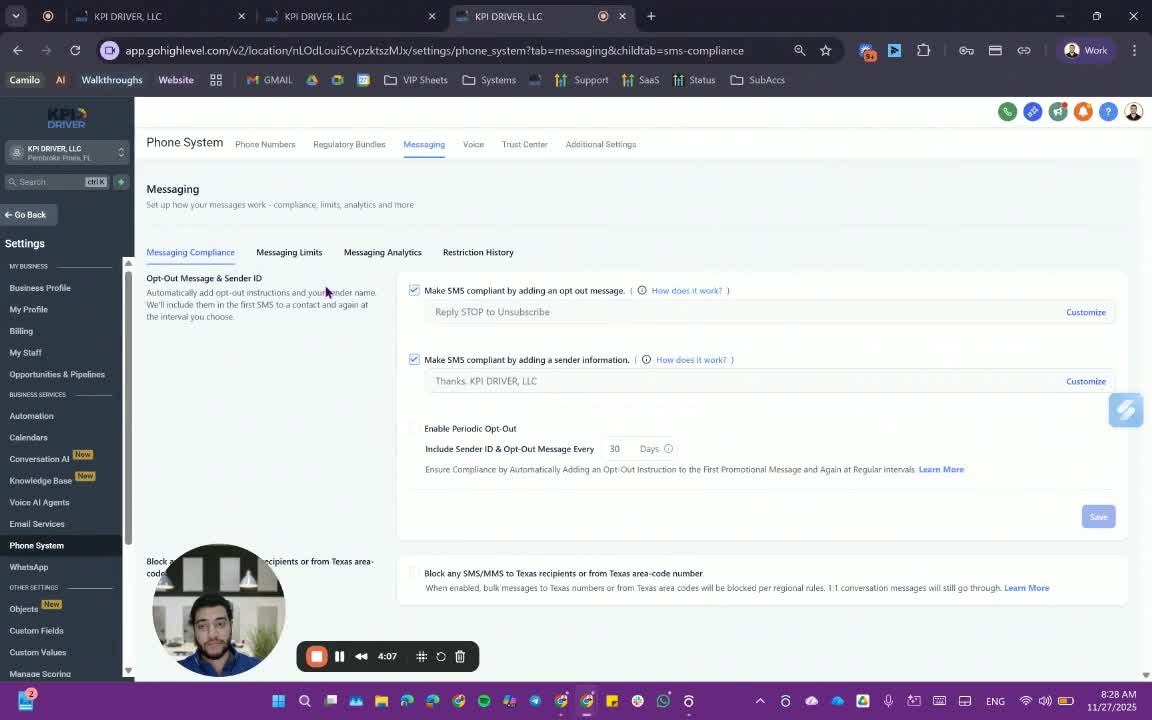
6. Configure Messaging Compliance 3:29
- Set up messaging compliance features:
- Block specific area codes.
- Add opt-out messages.
- Enable periodic opt-out messages every 30 or 60 days.
7. Monitor Messaging Analytics 4:23
- Regularly check messaging analytics for sent, delivered, and failed messages.
8. Set Up Call Features 5:19
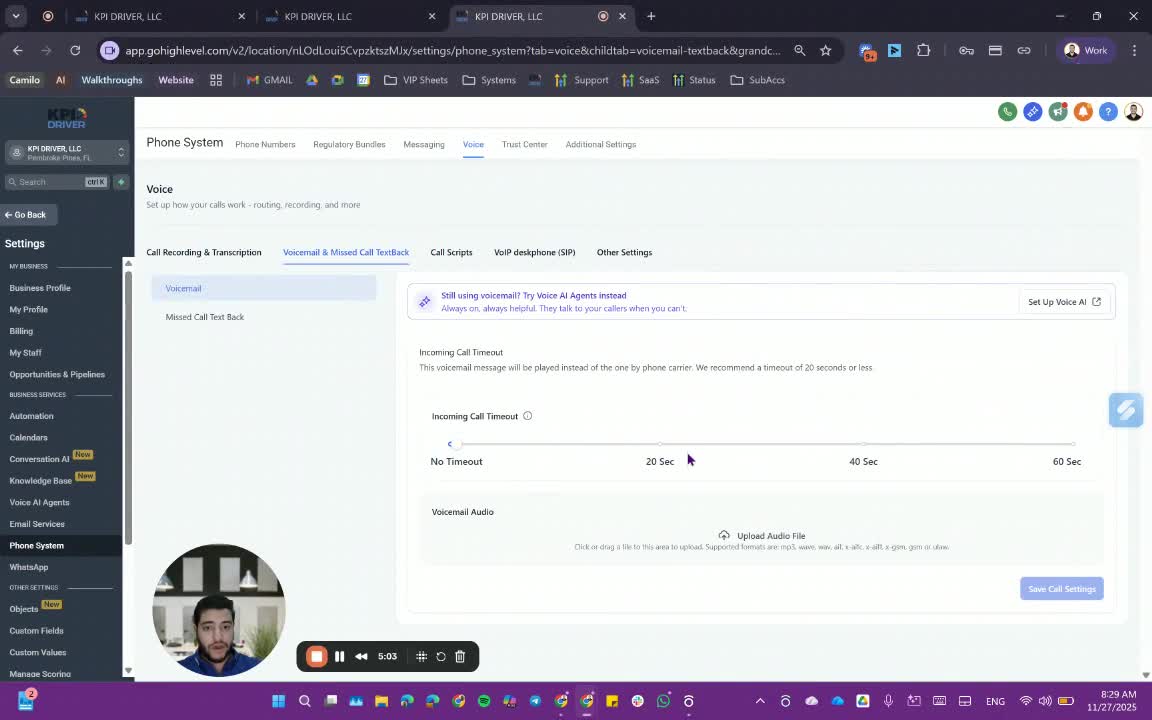
- Configure voicemail messages and missed call text callbacks.
- Set the incoming call timeout and choose the appropriate voicemail audio.
9. User Profile Configuration 6:46
- Go to My Staff and select the user.
- Under Call and Voicemail Settings, assign the inbound number and set call forwarding preferences.
10. Twilio Integration (if applicable) 8:03
- Log into your Twilio account.
- Navigate to Phone Numbers and select the active number.
- Apply the A2P 10 DLC campaign to the phone number and save changes.
Cautionary Notes
- Ensure compliance with FCC and FTC regulations when configuring messaging settings.
- Avoid assigning personal phone numbers to the system; use designated business numbers instead.
Tips for Efficiency
- Regularly review and update phone number assignments to ensure they align with current team roles.
- Utilize messaging analytics to optimize communication strategies and address any issues promptly.
Link to Loom
https://loom.com/share/ab2238124bbf407792366cd1b4abb817
Articles
Other Related Articles
FAQ
FAQ
What makes KPI DRIVER different from other real estate CRMs?
Do I need separate systems for document signatures, dispo, or rentals?
How long does it take to migrate my CRM to KPI DRIVER?
Will KPI DRIVER work if I’m new to real estate or don’t have a CRM yet?
Is the KPI Dashboard customizable?
How does KPI DRIVER help me scale my business?
Do you offer support or training?
How many leads, calls, and deals can KPI DRIVER handle?
How much does KPI DRIVER cost?

@KPI DRIVER LLC 2025. All Rights Reserved.
Design and developed by YAVACADO